
A Kärcher Puzzi nozzle plays a vital role in maintaining peak performance in carpet cleaning machines. Over time, cleaning residues, dust, and wear may cause the nozzle to underperform or even fail. This guide presents a detailed, step-by-step process for diagnosing and repairing a Kärcher Puzzi nozzle. Clear instructions, safety measures, and practical maintenance tips help restore full functionality. The aim remains to offer comprehensive, practical information that supports effective troubleshooting and repair while minimising the risk of further damage.
The guide explains the inner workings of the nozzle system, highlights common faults, and provides numbered repair steps. Emphasis remains on safety, careful documentation, and precise reassembly. Regular maintenance and preventive strategies support long-term reliability and efficiency. A systematic approach to repair and upkeep ensures that cleaning performance remains consistently high, thereby extending the unit’s lifespan.
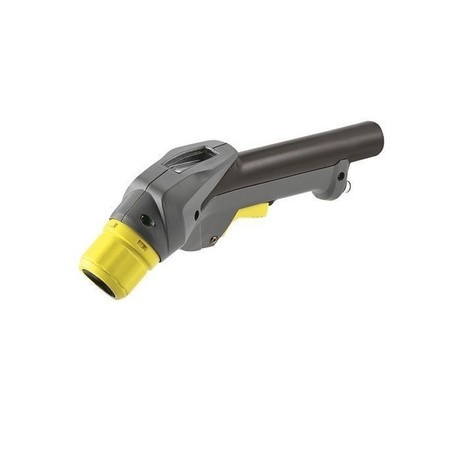
Understanding the Kärcher Puzzi nozzle system
A Kärcher Puzzi nozzle forms an integral part of carpet cleaning machines. The nozzle assembly consists of several interconnected components such as the spray head, internal channels, sealing rings, and connecting joints. Each element must function in harmony for effective cleaning. Over time, cleaning fluids and debris accumulate in narrow channels, causing clogs and reduced fluid flow.
The design utilises high-grade plastics and durable rubber. Continuous exposure to cleaning chemicals, however, can lead to wear and tear. Sealing rings may become brittle or crack, resulting in leaks and misalignment of the spray head. Blockages may occur when residues harden in internal passages. Detailed diagrams in the user manual provide visual guidance on the arrangement of components. Accurate knowledge of the system aids in identifying the source of malfunction.
Regular inspections help detect early signs of wear or residue build-up. A careful examination of the spray head, channels, and seals reveals faults that may impair performance. Addressing these issues promptly prevents minor clogs or leaks from developing into major problems. Early detection remains key to maintaining optimal cleaning efficiency and avoiding expensive repairs.
Pro tip: Regularly inspect the nozzle assembly using a gentle brush and visual checks; early detection of wear or debris can prevent more extensive damage.
Step-by-step repair instructions
A structured repair process ensures every component receives careful attention and precise reassembly. The following numbered instructions offer a clear, methodical path for repairing the Kärcher Puzzi nozzle. Each step has been designed to simplify the process and reduce the chance of error.
- Ensure complete safety by disconnecting the cleaning machine from all power sources. Remove batteries, cords, and any attachments. Prepare a clean, well-lit workspace with a soft cloth or mat on a flat surface. Consult the user manual for model-specific guidance. This initial step prevents electrical hazards and accidental damage during repair.
- Gather all necessary tools and replacement parts. Assemble a toolkit including assorted screwdrivers (both flathead and Phillips), small wrenches, and pliers. Collect soft-bristled brushes, compressed air, and a container for organising small fasteners. Source replacement sealing rings or a new spray head if inspection indicates wear. Keep a notepad and pen handy for recording the order of removed parts.
- Remove the nozzle assembly from the main unit. Locate fasteners or clips securing the nozzle to the device. Carefully unscrew or unclip each fastener using the appropriate tool. Place each screw or clip in a labelled container to avoid misplacement. Gently detach the nozzle assembly and set it on the prepared work surface.
- Disassemble the nozzle assembly by separating the outer casing from internal components. Slowly unscrew any bolts or retaining clips without forcing any parts. Organise each removed component on a non-slip surface or within a labelled container. Capture clear photographs at this stage to document the original configuration. Thorough disassembly ensures accurate repair and simplifies reassembly.
- Inspect every component meticulously. Examine the spray head for cracks, deformations, or other physical damage. Check all sealing rings for brittleness or wear caused by exposure to cleaning agents. Look for blockages in internal channels that may restrict fluid flow. Use a soft brush or compressed air to remove visible debris. Record any faults that require replacement parts.
- Clean all internal components thoroughly. Prepare a mild cleaning solution using warm water with a small amount of gentle detergent. Dip a soft-bristled brush into the solution and gently scrub internal channels and affected parts. Use compressed air to dislodge stubborn debris from tight spaces. Wipe each component with a damp cloth and allow complete drying on a clean, dry towel. Ensure all cleaning residues are removed before reassembly.
- Replace any worn or damaged parts. Compare each inspected component against specifications in the user manual. Replace sealing rings that appear cracked or brittle with genuine parts from an authorised supplier. If the spray head shows signs of damage, install a new one. Ensure replacement components fit securely and align correctly to prevent leaks and misalignment during operation.
- Reassemble the nozzle assembly using documented photographs and labelled parts as a guide. Begin by reattaching the cleaned internal channels into the outer casing. Carefully install the spray head, ensuring proper alignment of all seals and gaskets. Secure every screw and clip; avoid overtightening to prevent damage to the plastic housing. A precise reassembly guarantees proper fluid flow and suction.
- Reinstall the reassembled nozzle assembly into the main unit. Align the nozzle with designated mounting points on the Kärcher Puzzi machine. Secure the assembly with the fasteners removed earlier, ensuring each fastener returns to its correct position. Conduct a visual inspection to confirm that the nozzle is firmly attached and that no components remain loose or misaligned.
- Conduct a comprehensive test of the repaired nozzle. Reconnect the machine to its power source and initiate a test cycle. Observe the cleaning fluid’s behaviour to ensure an even spray pattern and adequate suction. Listen for any unusual sounds that might indicate misalignment or leaks. Should any issues appear, power down the machine and re-examine the assembly. Adjustments may be necessary until full functionality returns.
Pro tip: Document every stage of disassembly and reassembly with clear photographs and detailed notes; this record serves as a valuable reference during troubleshooting and ensures accurate reassembly of components.
Maintenance and prevention strategies
Post-repair maintenance remains essential to extend the unit’s lifespan and prevent future malfunctions. A consistent upkeep routine helps maintain optimal cleaning performance and avoids costly repairs. Preventive measures form an integral part of ensuring the nozzle remains free from blockages and wear.
After each cleaning session, wipe down the nozzle assembly with a soft, damp cloth to remove residual cleaning fluid and debris. Regular inspections, preferably on a monthly basis, help detect early signs of residue build-up or seal degradation. Gentle cleaning with a mild detergent may be necessary if residue becomes visible. Prevention measures include adherence to manufacturer guidelines regarding cleaning agents and careful handling of the machine.
Proper storage also contributes to prolonged performance. Store the machine in a clean, dry environment to minimise moisture exposure and the risk of damage. Avoid the use of harsh chemicals that may accelerate deterioration of seals and plastic components. A structured maintenance schedule, combined with routine cleaning, prevents accumulation of debris and ensures that the internal channels remain clear.
A simple list summarising effective maintenance practices includes:
- Wipe down the nozzle assembly after each use
- Conduct detailed inspections on a regular basis
- Use only recommended, eco-friendly cleaning agents
Periodic professional servicing may be beneficial for machines used frequently. Professional technicians can perform thorough inspections and replace worn components before minor issues develop into major malfunctions. A combination of regular self-maintenance and occasional professional checks ensures sustained performance and reliability over time.
Pro tip: Establish a regular maintenance calendar and adhere strictly to scheduled inspections; systematic care prevents unexpected breakdowns and maintains high performance over the long term.
Conclusion
Repairing a Kärcher Puzzi nozzle requires a structured, methodical approach that begins with thorough preparation and safety measures. Detailed disassembly, careful cleaning, precise replacement of worn parts, and systematic reassembly ensure that the unit returns to full functionality. Step-by-step instructions, combined with thorough documentation and preventive maintenance strategies, form a robust framework for restoring cleaning performance.
Regular maintenance and adherence to manufacturer guidelines help prevent recurring problems and extend the cleaning machine’s lifespan. A proactive approach to upkeep not only enhances performance but also reduces downtime and repair costs. By following the comprehensive guide provided, a reliable and efficient Kärcher Puzzi nozzle contributes to an optimally functioning cleaning system, ensuring consistent, high-quality results in carpet maintenance.
This detailed guide offers practical insights into troubleshooting and repairing one of the most critical components of the Kärcher Puzzi machine. Through careful planning, systematic execution, and regular maintenance, high cleaning performance can be maintained for years to come.
